This is a great little tank and very easily put together. Cammo is painted, and an allover wash of dark umbar followed by a wash of buff then a gloss coat was added. Next up decaling and a pin wash, then it's time to get messy and some serious muddy weathering.
Building scale model kits maily tanks, AFV's, armoured cars, helicopters....well basically anything which tickles my fancy and keeps me interested.
Saturday, 30 March 2013
Airfix 1/76 Universal Carrier Suez Crisis 1956
Having completed my MkI tank for the group build on Missing Lynx, I thought I'd start another one. This is the Airfix Universal Carrier as used by British forces during the Suez Crisis. as far as I can make out, it had become obsolete in the British motor pool, but this one must have been "liberated" from Egyptian forces and put to good use. Decal are from the Bison Decals sheet "Suez Crisis" and contains loads more decals which will be used in the near future. Its painted in a 50/50 mix of sand yellow and buff colour. The gaps where the foot holes were had to be filled, otherwise the 1/72 decal which fits here wouldn't and a sand skirt will be made from foil. This is as far as Ive got.
Airfix Club Kit - Under The Red Star - Spitfire
The Airfix Club Kit this year , well consists of three kits actually, all with excellent decals to reproduce aircraft flown by the Red airforce of communist Russia against the Nazis. The three kits you get are a Spitfire, Hurricane and Warhawk, all 1/72. The decals are to say the least, superb. The Spit , though, is just the older version not the newer re-tooled kit with engraved panel lines and cockpit, however you can still make a decent kit from it. I messed up with the cockpit glazing, trying unsuccessfully, to mask it with basic B&Q masking tape. I have since bought some Tamiya tape, which is supposed to be much better. Overall, I'm quite pleased with how its turned out and thinking about it, this was my first ever Spitfire built. Weathering was kept to a minimum, with a little bit of silvering on the wing where the constant shuffle of feet in and out of the a/c has worn away the surface paint. Smoke dust from the guns has also been added using Mig powders.
Airfix WWI MkI tank in Gaza - Part II
Finally got round to taking some pics of the finished thing, so here they are. I was in Liverpool last week andjust happened to wonder into ModelZone, as you do, and ended up picking up two more WWI Male tank kits for such £1.99 each. I have the Airfix Conversion book by Tom Cole which will give me plenty of options for those other tanks. Next up is the Female "we're all in it" complete with tail wheels and funky camo scheme, then maybe "mother" (the first tank) and possibly a Russian one...who knows. BTW, I also picked up a couple of WWI bi-planes which were also in the sale, as I stupidly fancy having a go at rigging one of those things before trying the huge Handly Page 0/400.
Anyway, onto the pics.

Anyway, onto the pics.
Seperated by over 90 years. Two British, in their day, state of the art tanks.
Friday, 1 March 2013
1/72 Dragon Challenger 2, Iraq 2003
I started making this kit a few years ago and then stopped. Having a bit of spare time on my hands, this was the first one I chose to finish. I'm prettyb happy with the way it's turned out. The stowage sheet was scratched from a tissue soaked in diluted white glue and then ties with cotton and placed on the tank, although I put it on too high along the sides stopping the turret from turning. Oh well at least it covered the space where the tow cables should have been. These along with the tracks were too small and didn't fit the holes provided, even with gentle stretching. The tracks didn't matter so much as they were mostly covered by the armour. Overall this is a great kit and the level of detail is exceptional. I believe there are a few dimentional errors regarding the turret but to me it looks like a Chally. You also get two excellent GPMGs, and only needing to use one you're left with a spare which will look great sticking out of a Sea King or Merlin.
The figure is from ?? RH Models. you get three in a packet, all different. The thermal recognitional panels were cut from plasticard and the aerials were from those plastic pieces of string which attach swing tags to clothes. They should all be straight but we'll put it down to battle damage!! Weathering was done with pastal chalks.
Thursday, 28 February 2013
1/144 B-17
Not having built an aircraft for years and years ( I think I had hair down to my shoulders then) I decided to try one again but not having the space thought I'd plump for some 1/144 kits. The B-17 was always my favourite bomber of WWII and I built the Airfix kit back then, so I bought the Minicraft kit. Well, it was not as accurate as I'd hoped and required quite abit of work to it. A lot of the parts (mainly the 2 fuselage halves) don't fit very well, as doesn't the cockpit glass. As there's nothing to see inside I painted these blue/black as this also means you can paint in all the glass that is missing ie the windows over the pilot seats, the rear pilot side windows and the windows where the bombadier and navigator sit. Guns were cut from surgical canulas/drawing up needles and will be attached last. A good option is to provide your aircraft in flight with pins provided to attach your "spinning" props to the nacelles, which is what I intend to do. I'll get some pictures up soon.
I noticed in a picture that that some B-17s had anti-glare Olive Drab painted on half of their nacelles so I decided to paint this on just to provide a bit of contrast with the silver. I still have some black to paint along the wing edges and then the decals and guns and I'll call it done. Here are a few progress pics so far.
I'm calling this done now. It's not really been a pleasure to build more a bind to be truthful. I was going to add a wash and some weathering but to be honest I couldn't be bothered. The decals were dreadful and very thick and didn't settle down well even with decal fix. You get red bands for the wings and tail fins, but because they're so thick they wont conform to the wings properly so I ditched these and tried to mask and paint them myself. It actually looks better in the pictures than in real life. I've not been put off 1/144 aircraft, on the contrary, I have a couple of B-52s, a B-24 and a B-29 in the stash waiting.
I had a go at making the props in flight but this needs more work for the next one. The props are too thick and too dark. They should be more of a thin, faint "V" shape than an actual prop shape. I might actually cut out the V shape next time and leave a longer curved bit along the outer edge for the yellow.Airfix WWI MkI tank in Gaza
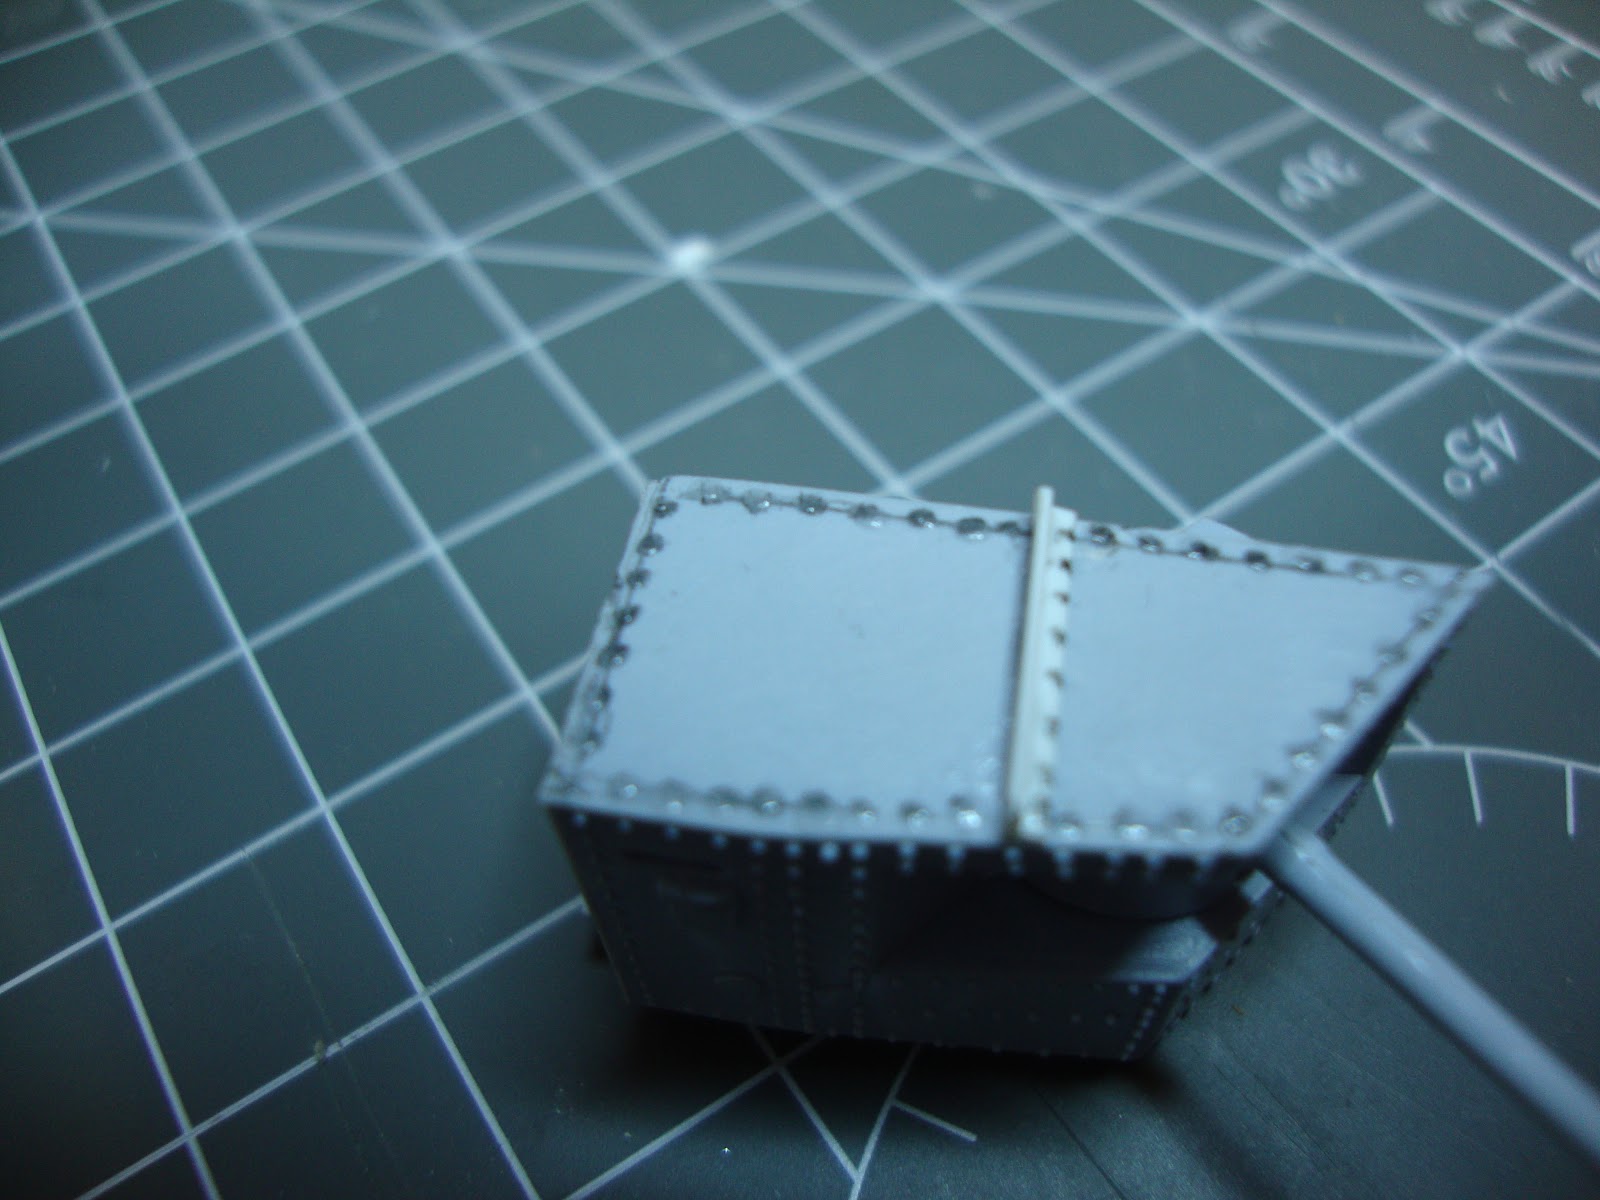
The other changes include cutting off the "cheese dish" and sealing the hole with plasticard, replacing it with a round hatch, enlarging the cab area and filling in the square hatch on the roof, and changing the exhaust to upside down "V" plates. Two new "T" bar supports were also added on the roof along with an "L" bar across the roof of the sponsons. The cab also needs gun port shields and visors on the sides. Phew!! These last things were the trickiest due to their size.
Below is just before an undercoat.
...and just after an undercoat.
I've now put a couple of coats of Vallejo English Uniform khaki on it and painted the tracks. Almost done. Pics to follow.
Its amazing what you pick up when you see it on your pc screen. There are quite a few bits I've missed so another coat is in order. i'll do that tonight.On closer inspection the rivets look way too big and flat. I still have to make an armoured box to cover the lifting mechanism for the tail wheels which were fitted to MkI's to help with steering. It was soon discovered that these did little if anything at all to help and were taken off all subsequent tanks and probably any remaining ones in the field. By the time these MkIs got to Palestine the wheels were left off but on HMLS Sir Archibald a plated box covering this was left on. Hopefully I can fit the tank's name onto this as it was in the field, but if not it'll have to go on the front glasis plate.
I've built the metal covering for the tail wheel hydraulics which fits at the back. It needs painting and gluing on then I can start on the decals and weathering. I tried a different method for the rivets, using 0.5mm plastic rod, however they're still too big and some came off when sanding them down as best I could. I need to cut them smaller next time.
Subscribe to:
Posts (Atom)